Do you have a green thumb? Many people love to garden but may not know how to test their soil to see what kind of plants will grow best in it. Soil testing is important in gardening, so don’t skip it! This blog post will discuss how to test your garden soil and what the results mean. We’ll also provide tips on improving your soil if it’s not ideal for growing plants.
Contents
Why Test Your Garden Soil?
It’s no secret that healthy soil is essential for a healthy garden. After all, the soil is where plants get their anchor to grow, access vital nutrients, and protection from too much or too little water. But how can you be sure that your soil is as healthy as it can be? The answer is simple: by testing it regularly. Soil testing can tell you a lot about the health of your soil, including its nutrient levels, pH balance, and texture. Armed with this information, you can make changes to improve your soil’s quality and support the growth of strong, healthy plants. What’s more, soil testing can help you avoid problems before they start. For example, if your test results show that your soil is too acidic or alkaline, you can take steps to adjust the pH level before planting. In short, routine soil testing is a critical part of any good gardening practice.
When Should You Test Your Garden Soil?
Spring is the perfect time to test your garden soil. The soil is thawed and easier to work with, and you can take advantage of the warmer weather to get a jump start on your gardening projects. However, it’s essential to remember that soil conditions can vary depending on the time of year. For example, if you live in an area with a lot of rainfall, the springtime soil may be more saturated than usual. As a result, it’s essential to consider these factors when testing your garden soil. By testing the soil early in the season, you can ensure that it has the proper nutrients and pH levels for your plants, giving them a better chance of thriving when transplanted into the ground.
How To Take A Garden Soil Sample
Before you can amend your garden soil, you need to know what kind of nutrients it lacks. The best way to do this is to take a soil sample and send it to a laboratory for analysis. Luckily, taking a soil sample is easy and only requires a few simple supplies. First, find an area of your garden that represents the soil conditions throughout the site. For example, you might take a sample from the top inch of soil and the six-inch and twelve-inch levels. Then, remove a small soil sample from several depths using a clean shovel or trowel. Once you have collected your samples, carefully place them in a clean container and seal it tightly. By getting your soil tested, you can ensure that your garden will have the nutrients it needs to thrive. Make sure to label your sample with the garden’s name and the collection date. Then, contact your local extension office or agricultural laboratory to find out how to submit your sample for testing.
Garden Soil Test Results And What They Mean
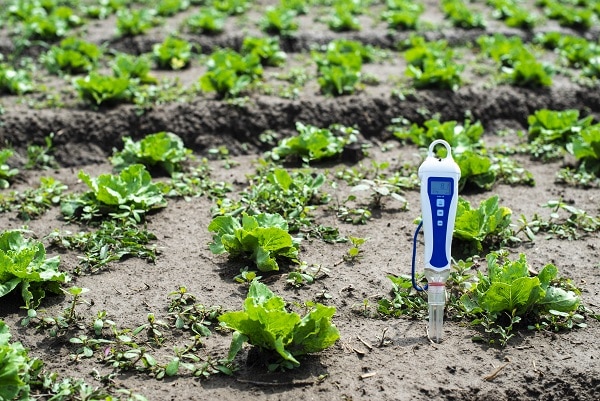
A soil test is an essential tool for any gardener. By testing the soil, you can determine what nutrients it lacks and what amendments need to be added to create a healthy growing environment. Test results can also provide valuable information about the pH level of the soil and its ability to retain moisture. Most garden centers offer soil testing services, or you can purchase a kit and test the soil yourself. The first step in interpreting your soil test results is identifying each nutrient’s target range. This information is usually on the back of the test results form. Once you know the target range, you can compare your results to see which nutrients are deficient that you need to add. For example, if the phosphorus level is low, you may need to add bone meal or another type of phosphorus fertilizer. It’s also important to pay attention to the pH level noted on your results form. Most plants prefer slightly acidic soil with a pH between 6.0 and 7.0. If your soil is too alkaline or acidic, it can be amended with lime or sulfur to reach the desired pH level. Finally, take note of the “moisture retention” number on your form, which indicates how well your soil drains and how much water it holds onto. If this number is low, your soil drains quickly and doesn’t hold onto moisture very well. In this case, you may need to add organic matter, such as compost, to help improve moisture retention. By understanding your soil test results, you can take steps to create a healthy growing environment for your plants.
Lime Tips
If the pH of the soil is ideal for optimum plant growth, no lime recommendation will be given. However, if the pH is too low, a recommendation is to apply lime at a certain rate per 1,000 square feet. Sometimes, this recommendation will be in tons per acre instead. An acre equals 43,560 square feet while one ton of lime weighs 2 pounds—thus explaining why 46 pounds would equal one ton per acre. When exchangeable aluminum falls below 5.5 on the pH scale, it becomes toxic levels for plants–liming exists to prevent this from happening by reducing soluble aluminum’s presence. Although soils with the same pH may have different lime recommendations. However, those with low organic matter or high sand require less lime to change the pH than clayey soils or those with high organic matter because clayey soils contain more potential acidity than clayey soils sandy soil.
Use These Tips When Testing Your Garden Soil
In conclusion, testing your garden soil is vital in ensuring a healthy growing environment for your plants. By taking the time to test the soil and understand the results, you can ensure that your garden has all the nutrients it needs to thrive. Remember to pay attention to the target ranges for each nutrient, as well as the soil’s pH level and moisture retention. With this information, you can make the necessary amendments to create a healthy growing environment for your plants.


