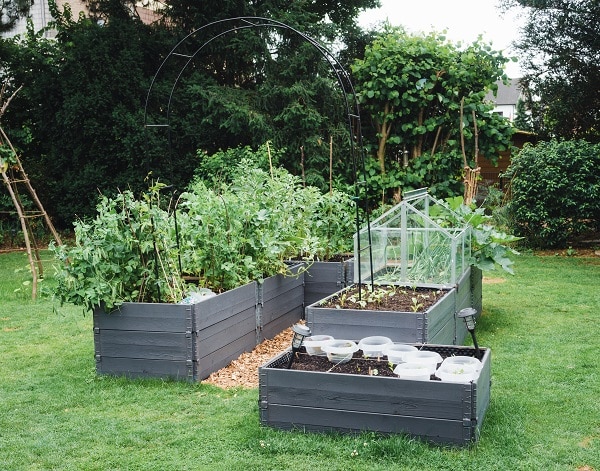
In recent years, gardening has become a popular pastime for many people. The growing interest in the ecological and sustainable living movement has also fueled a green thumbs craze among environmentally-conscious homeowners who want to grow their own vegetables and herbs. However, not everyone has plenty of room in their backyard or garden plot to produce as many plants as they would like. If this sounds like you, don’t worry! You can easily build a raised garden bed, and this article will tell you how!
Choose The Location For Your Garden Bed
The first step of making a raised garden bed is to find an ideal location for your garden. You should pick a place that gets at least six hours of sunlight per day, and you will want the ground underneath the bed to be flat, so it does not tip over or sink as you fill it with soil. You will also want to place the bed where it is easy to access, so you do not have to strain yourself when tending or harvesting your garden.
You should also consider the fact that your garden will need a certain amount of drainage. If the ground is boggy or wet, you may want to choose another location, as this can cause the bed to sink and tip over if there is not an adequate water run-off.
Preparing The Area Of Your Garden Bed
Once you have chosen an area for your new raised garden bed, you will need to clear the ground before digging to set your frame in. The ground should be free of sticks, stones, roots, and other debris that may negatively impact your garden bed’s support structure or look. You can do this by raking the area thoroughly or using a leaf shredder if there is not much debris. Once you do this, it’s time to mark out the area where you will build your raised garden bed.
Locate & Mark The Edges Of Your Garden Bed With String

To find the edges of your future garden bed, get a long piece of string and tie it to a wooden stake at one end. Pull the string tightly just above ground level until you reach the other end of the frame you are setting up. Lower to ground level and secure this end with another stake. If you are making a rectangular garden bed, use these two stakes to mark your future raised garden bed. For other shapes, you will have to measure out your suggested dimensions for your garden bed using string before marking them on the ground with stakes.
Make The Frame For Your Raised Bed

Once you have a location for your garden bed, it is time to create the frame. You will need four corner posts that are one foot longer than the width of your garden bed. If you plan to enclose the bed with a fence, position these posts to run perpendicular to the fence line and set them at least three feet apart from one another. Be sure to use treated lumber if you plan to enclose the bed with a fence because this type of wood will not be affected by rot or decay even when in contact with moist soil. If you plan to leave the frame open, this isn’t necessary.